DIY Concrete Gas Fire Pit
The first and last time I'm ever working with concrete
My wife and I really liked the look of white concrete fire pits that we found online. However after seeing the pricetag ranging into the $2000 range, I thought to myself “Hey, I could do that myself. How hard could it be?” The answer is very hard, and very very frustrating. I’ve been working on this project for a little over a year now, and it’s FINALLY done.
The Design
One primary advantage to DIY projects is that you have more control over the dimensions of whatever it is you’re building. This helps ensure that things fit nicely in the space available, and don’t look too large or too small.
After sitting on the loveseats that I had previously built, we took some rough measurements for how tall and wide we thought the firepit should be.
We came up with a fire pit that should be 30” in external diameter, and have a 19” diameter opening in the center to accomodate a natural gas burner/igniter kit that we found for sale on Amazon.


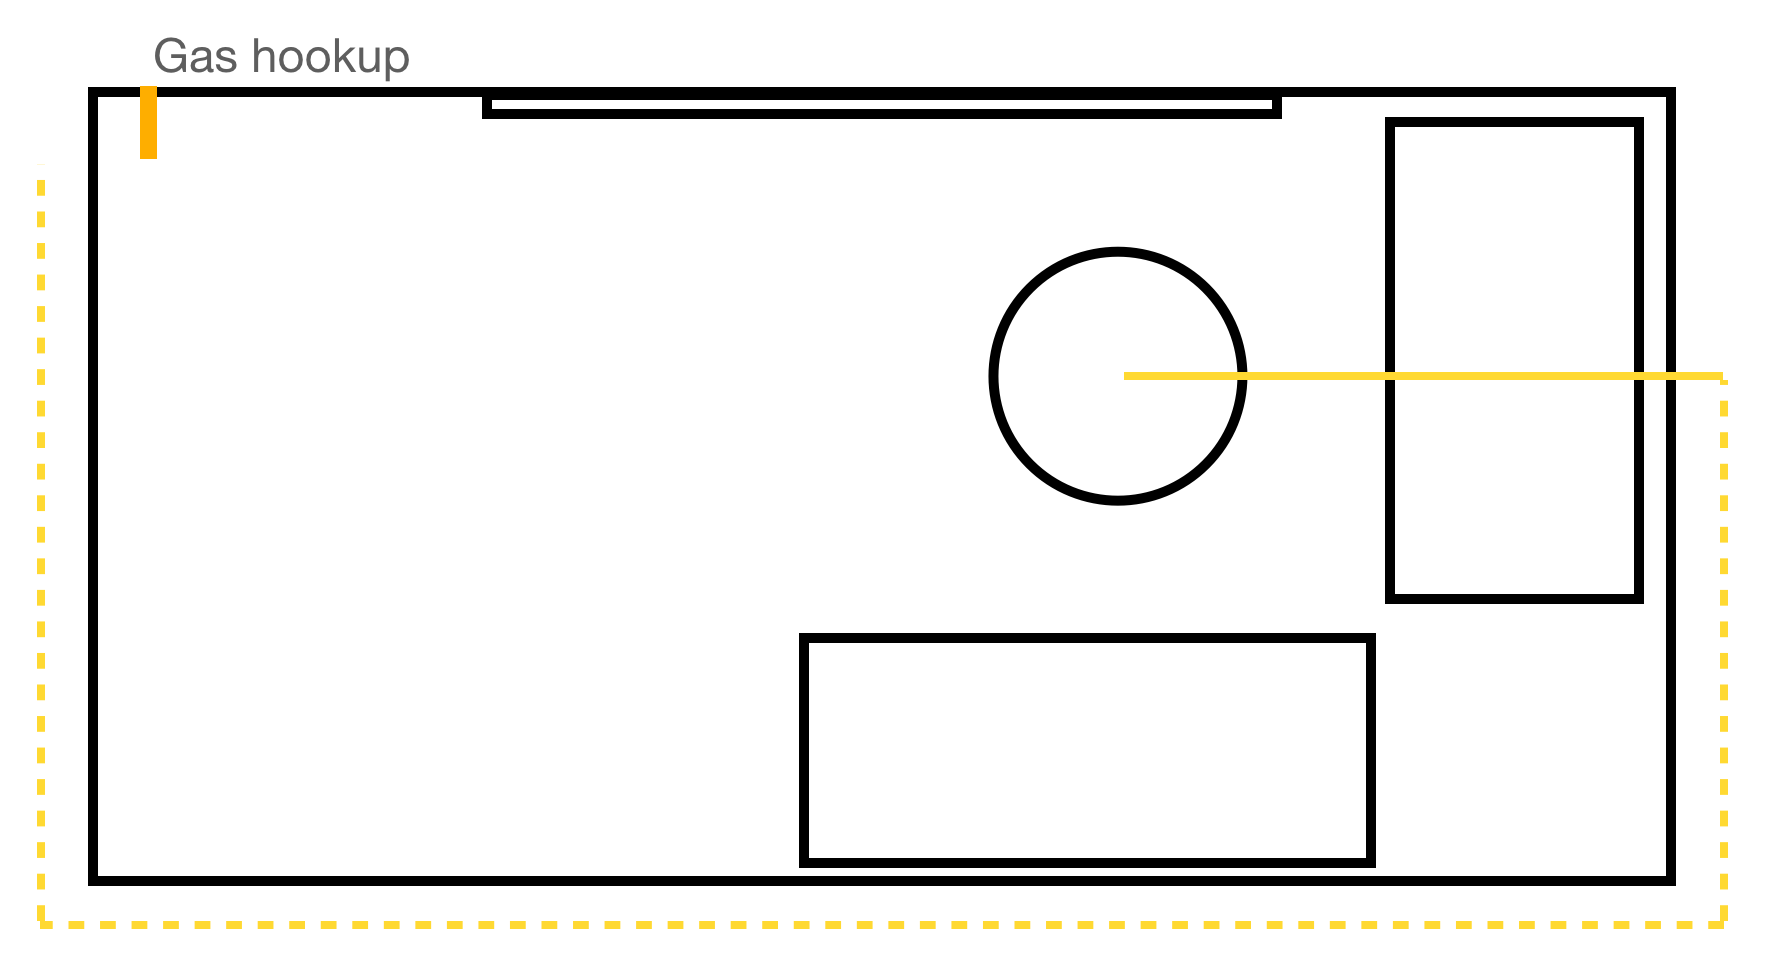
Fortunately, our house already has a natural gas hookup on the exterior for a grill. The original plan was to bury a gas line from the external hookup, around our patio, then pop up right behind one of the benches and run a hose beneath the outdoor rug up into the bottom of the fire pit:
Preparation
I began by building the wooden form that I would pour the concrete into.


The basic idea was to build the form in two halves that could be joined together on top of a plywood base. The two halves would be easy to pull apart after the concrete had cured. The inner portion of the form was also built in two halves that would be pulled out of the center of the fire pit. I didn’t have a circle-cut jig for my router, so I improvised and used a little piece of scrap wood with a nail and some holes to trace semi-circles, then followed-up with a jigsaw.

After building the frame for the form, I cut sheets of heavy posterboard and nailed in in place to line the form. I looked into using thin plywood or plastic sheets but I couldn’t find anything that would bend enough, especially for the tight radius of the internal section of the form. Over the posterboard, I layered long sheets of smooth cabinet-liner to create a moisture barrier.
With all the pieces built, I moved everything to the back patio for assembly. Thankfully I had a bit of foresight to pour the concrete in the exact spot where it would eventually sit. I didn’t take any pictures of this, but I made small cutouts for where the inline shutoff kit would sit within the wall of the firepit, and a second cutout for airflow on the inside in case of a gas leak. I then screwed it all together and caulked the seams.
Finding the Materials
While I was working through building the form, I spent many hours tracking down the materials that I would use. The desire was to have white concrete, which has a very clean look to it. Well, I finally found white cement, but finding suitable white aggregate and sand was a massive headache. I eventually found bags of white landscaping stone and boxes of white sand (at an educational store of all places - I suppose for little sandboxes for kids?). I did some test pours of the concrete that turned out alright, but the sheer cost of buying the special sand and stone for a project of this size was a non-starter. Back to square one.
After lots more thinking and hitting my head on my desk, I realized that I would have to apply a sealant to the concrete eventually anyway to help protect against the elements (I planned on buying a cover as well, but still wanted to make sure this thing would last). Well, turns out you can buy tinted sealant. So I bought greyish-white tinted sealant and some standard Quikrete sand and stone which is dirt cheap. Problem solved.
I don’t have the exact numbers anymore, but I did a slight variation of the standard 3-2-1 ration of aggregate, sand and cement. I went out and bought a handheld mixer to mix the concrete in a bucket, but realized that I’d have to do somewhere on the order of 200 buckets of concrete. No thanks. I ended up buying a plastic trough and a shovel instead.
Execution
Materials aqcuired? Check. Form built? Check. Time to start pouring concrete!

Look at that face. I was so excited and full of enthusiasm. If it’s any indication of how things would go from this point on, that’s the only picture I took that day…
Well, pouring the concrete was a nightmare. It was a hot day, my back was killing me, the form was leaking around the seams, I couldn’t get a smooth top surface, etc. etc. etc. When I was done I didn’t even bother cleaning off the tools, I just tossed everything in the trash. I promised myself I would never do a project with concrete ever again.
By my estimate, the cure time should’ve been about three days, but I left it for a week to be safe. When I took it off, I didn’t even bother to take pictures. There were LOTS of little air bubbles on the side, despite spending a very long time aggitating the form and adding more concrete. Also the concrete didn’t fill in properly around the openings that I left for the shutoff and airflow. I had to use a container of pre-mixed concrete to fill that all in by hand. It looked… rough… to say the least.

And wouldn’t you know? when I filled in the opening for the gas shutoff, I made the hole too small! I tried to grind away at the concrete, but in the end I had to just cut about 1/4” off the metal plat for the shutoff to fit.
After applying the tinted sealant, it started to look a bit more presentable. Still a bit rough, but honestly better than I thought it would look after all the problems I had run into thusfar.

It took the two of us to gingerly shift the monstrosity off the 2x4s and plywood base, but eventually it was sitting nicely on the rug. You can’t see it, but on the opposite side there’s a small hose-sized opening on the ground face for the gas hose to fit through.
What about the gas? Long story short, after researching more about burying gas lines, I decided this was not a good thing to DIY, and instead opted to buy a long natural gas hose with a quick-connect attachment, and simply running it above ground around the patio along a similar path. The hose is intended for outdoor use, and in the winter I can simply unhook it and wind it up. Then in the spring, I can put it back out and shove some landscaping rock overtop. Much simpler, and much safer.
During the process of buying a gas hose I learned a lot about the different dimensions of gas fittings, flared and non-flared, etc. That made my head spin.
Finally, we bought some of those black lava stones, turned on the gas, and…


I was pleasantly surprised, to be honest. Unfortunately the spark igniter doesn’t sit close enough to the gas openings in the burner to ignite it quickly, so you have to use a long indoor candle lighter. But it’s done! And it’s certainly not going anywhere - it’s HEAVY.
All-in-all, I’m pretty happy with how it turned out. I wish the top surface were a bit more smooth, but the whole thing has a bit of a rustic look to it. Definitely puts out heat and really adds to the ambience of our little patio!


