Image Morphing
Make fun GIFs!
I recently finished a final project for school to implement image morphing, and made some fun GIFs along the way!
The general image morphing algorithm is as follows:
- Choose corresponding points in two images - call them the “source” and “target” images.
- Define a triangulation (e.g. Delaunay triangulation) on the points in the source image.
- Apply the same triangulation to the points in the source and target images. By applying the same triangulation, we now have corresponding triangles in the two images (i.e. for vertices \(a1\), \(b1\), \(c1\) in the source image the corresponding points \(a2\), \(b2\), \(c2\) are the vertices to a corresponding triangle in the target image).
Now we can begin computing each frame in the morphing animation. For each time \(t\) in the range \([0, 1]\):
- Determining the average shape by taking the weighted average of each pair of corresponding points. Applying the same triangulation from above, we now have a collection of triangles at time \(t\) - call them “average” triangles.
- For each average triangle, compute the affine transformation from the corresponding triangle in both the source and target images.
- For each pixel in each average triangle, use the affine transformations from the triangle to determine the corresponding point in the source and target images.
- Compute the weighted average of the source image pixel and target image pixel, and that will be the pixel value in the frame at time \(t\).
Once all frames are computed you can create a fun animated GIF!
Implementation
Please note that this project was created for a school project, and there are many, many things which could be improved upon. But at the end of the day, it worked, and that’s what counted!
I implemented this project using the following technologies:
- OpenCV - Image IO, computing affine transformations
- Scipy - Computing Delaunay triangulations
- Matplotlib - Creating plots
- ImageMagick - Producing the animated GIF
- Flask - Web server
- Bootstrap - Making a half-decent looking UI
- Docker - Portable distribution
Images are chosen from the webpage and drawn on an HTML canvas. A second canvas is placed in front of the image to collect and render the corresponding points that a user selects.
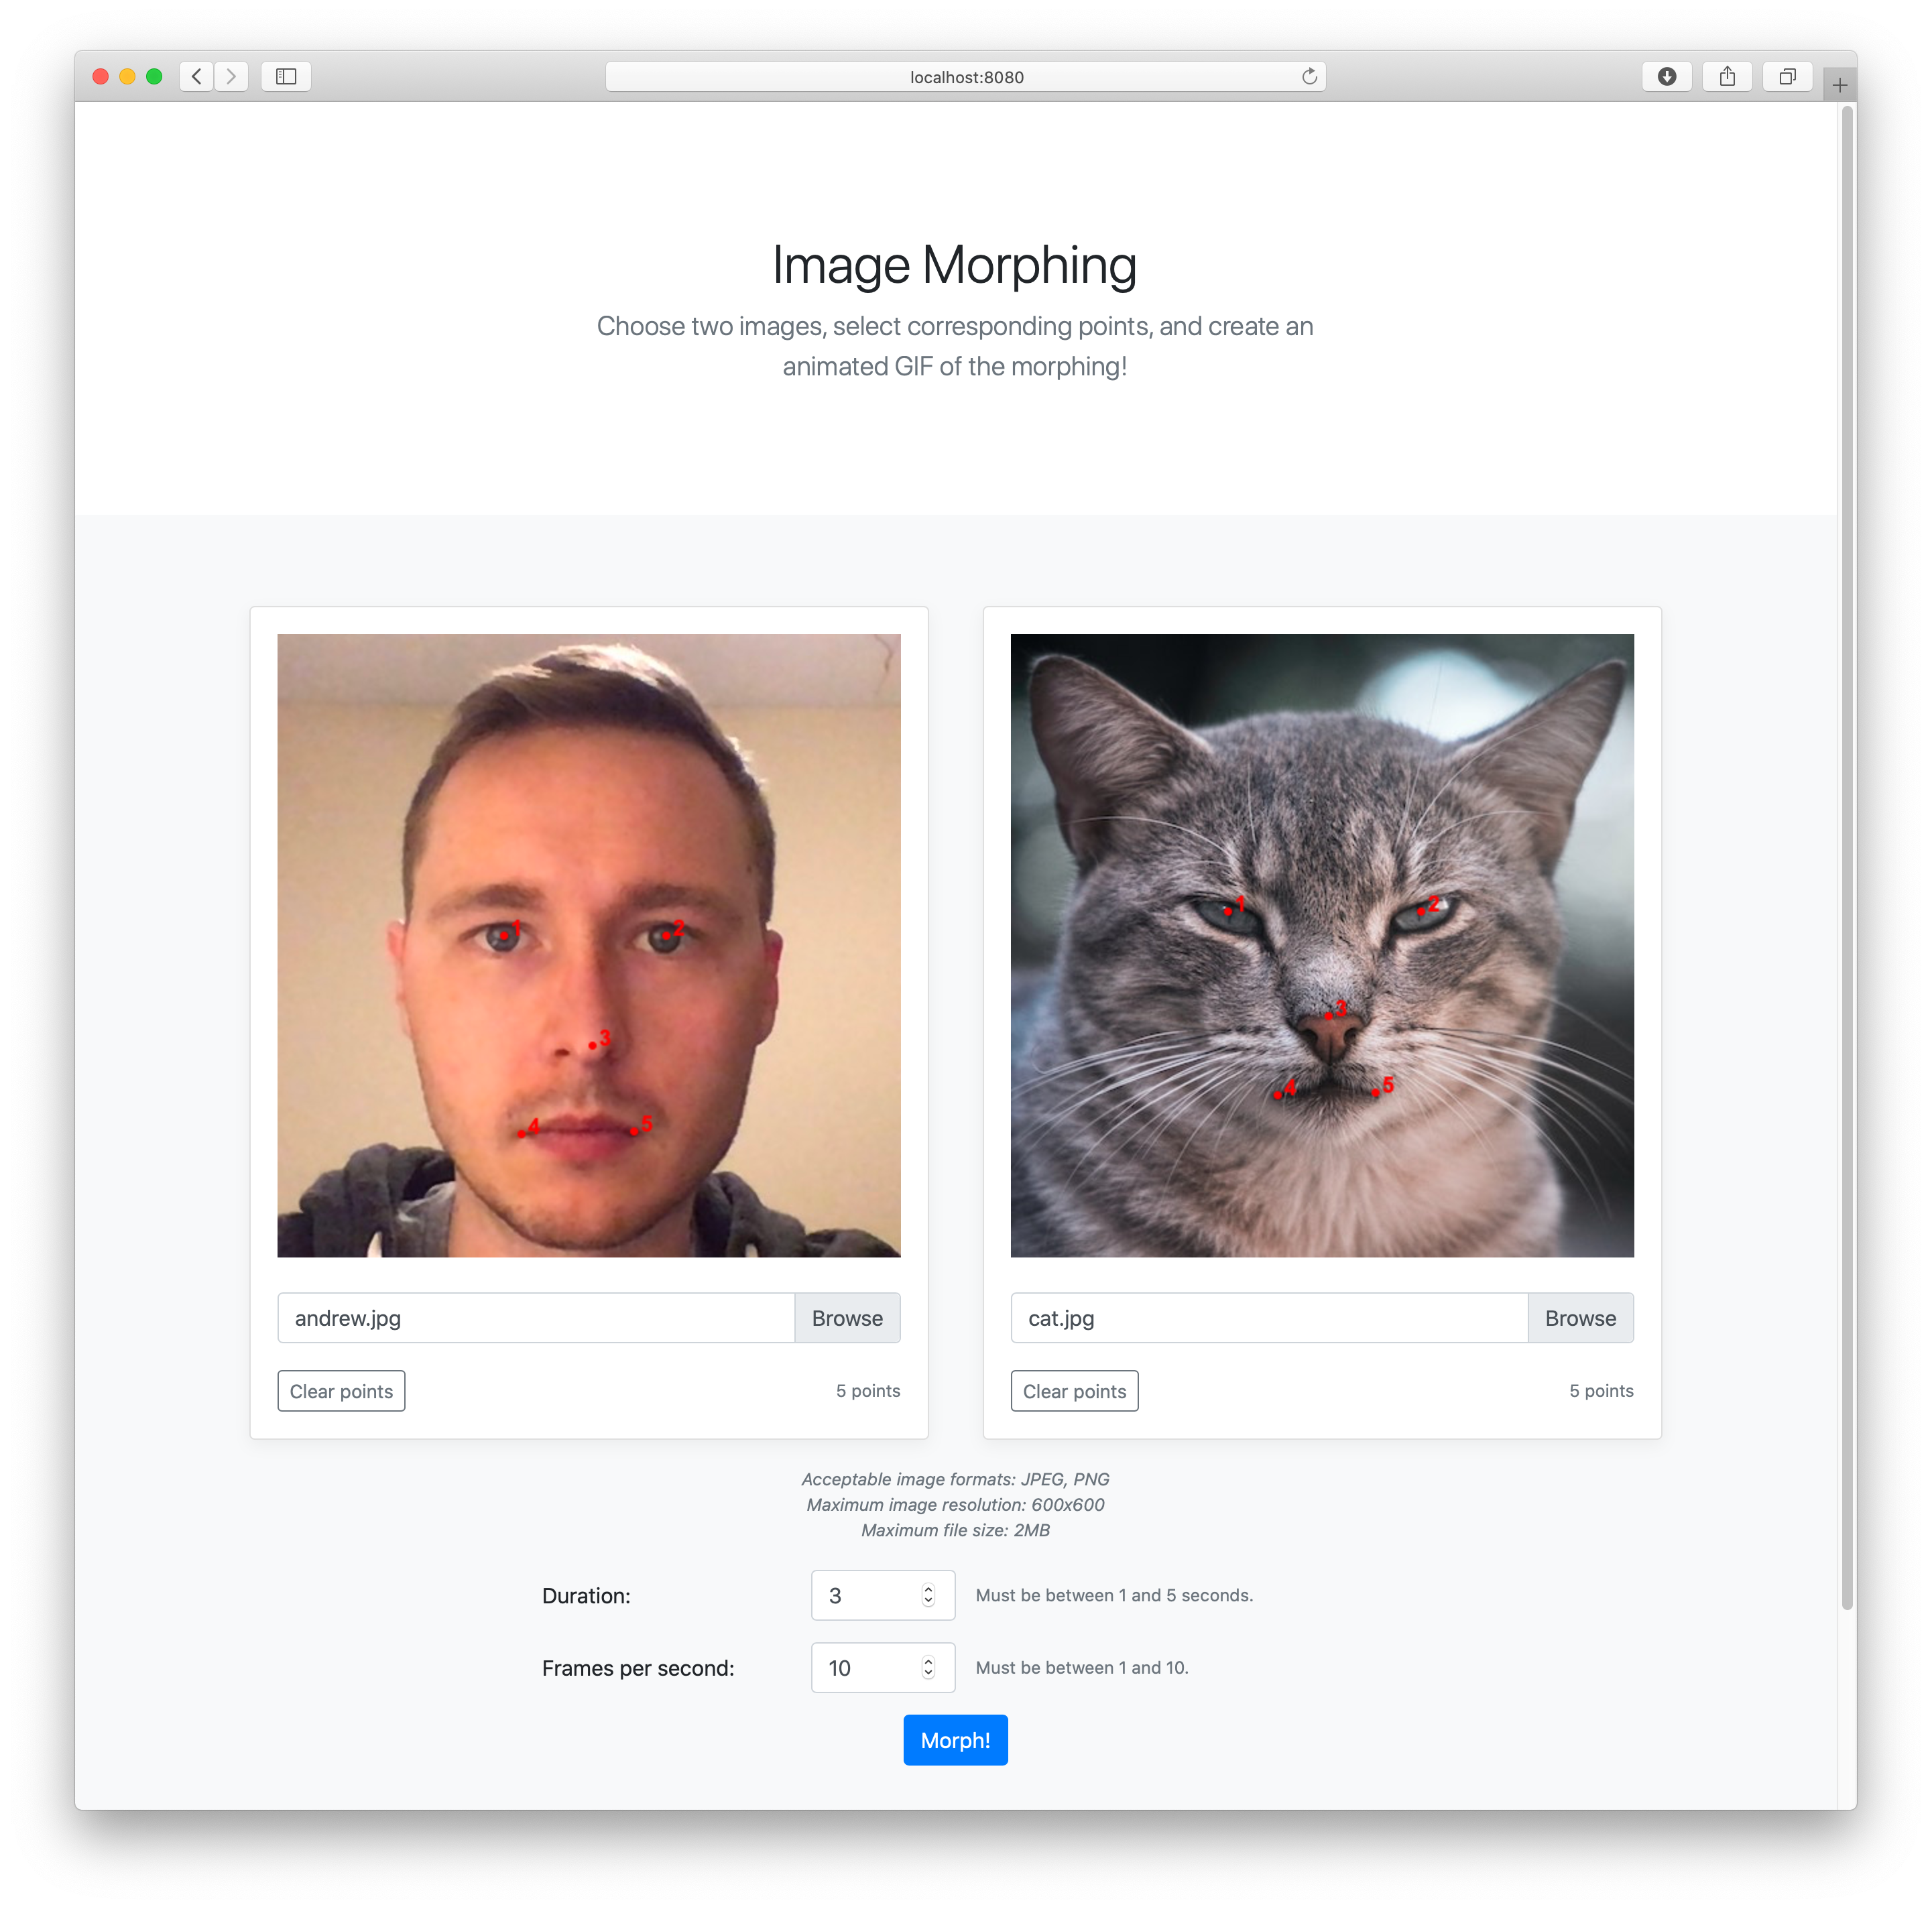
The user can then specify some parameters for the GIF that will be produced (duration and FPS). When the “Morph!” button is selected, the images are sent to the Flask server to begin processing.
While the morphing is occurring in the background, the user is redirected to a results page to begin viewing some intermediate results (a visualization of the corresponding points that were selected, and the triangulation applied to both images).
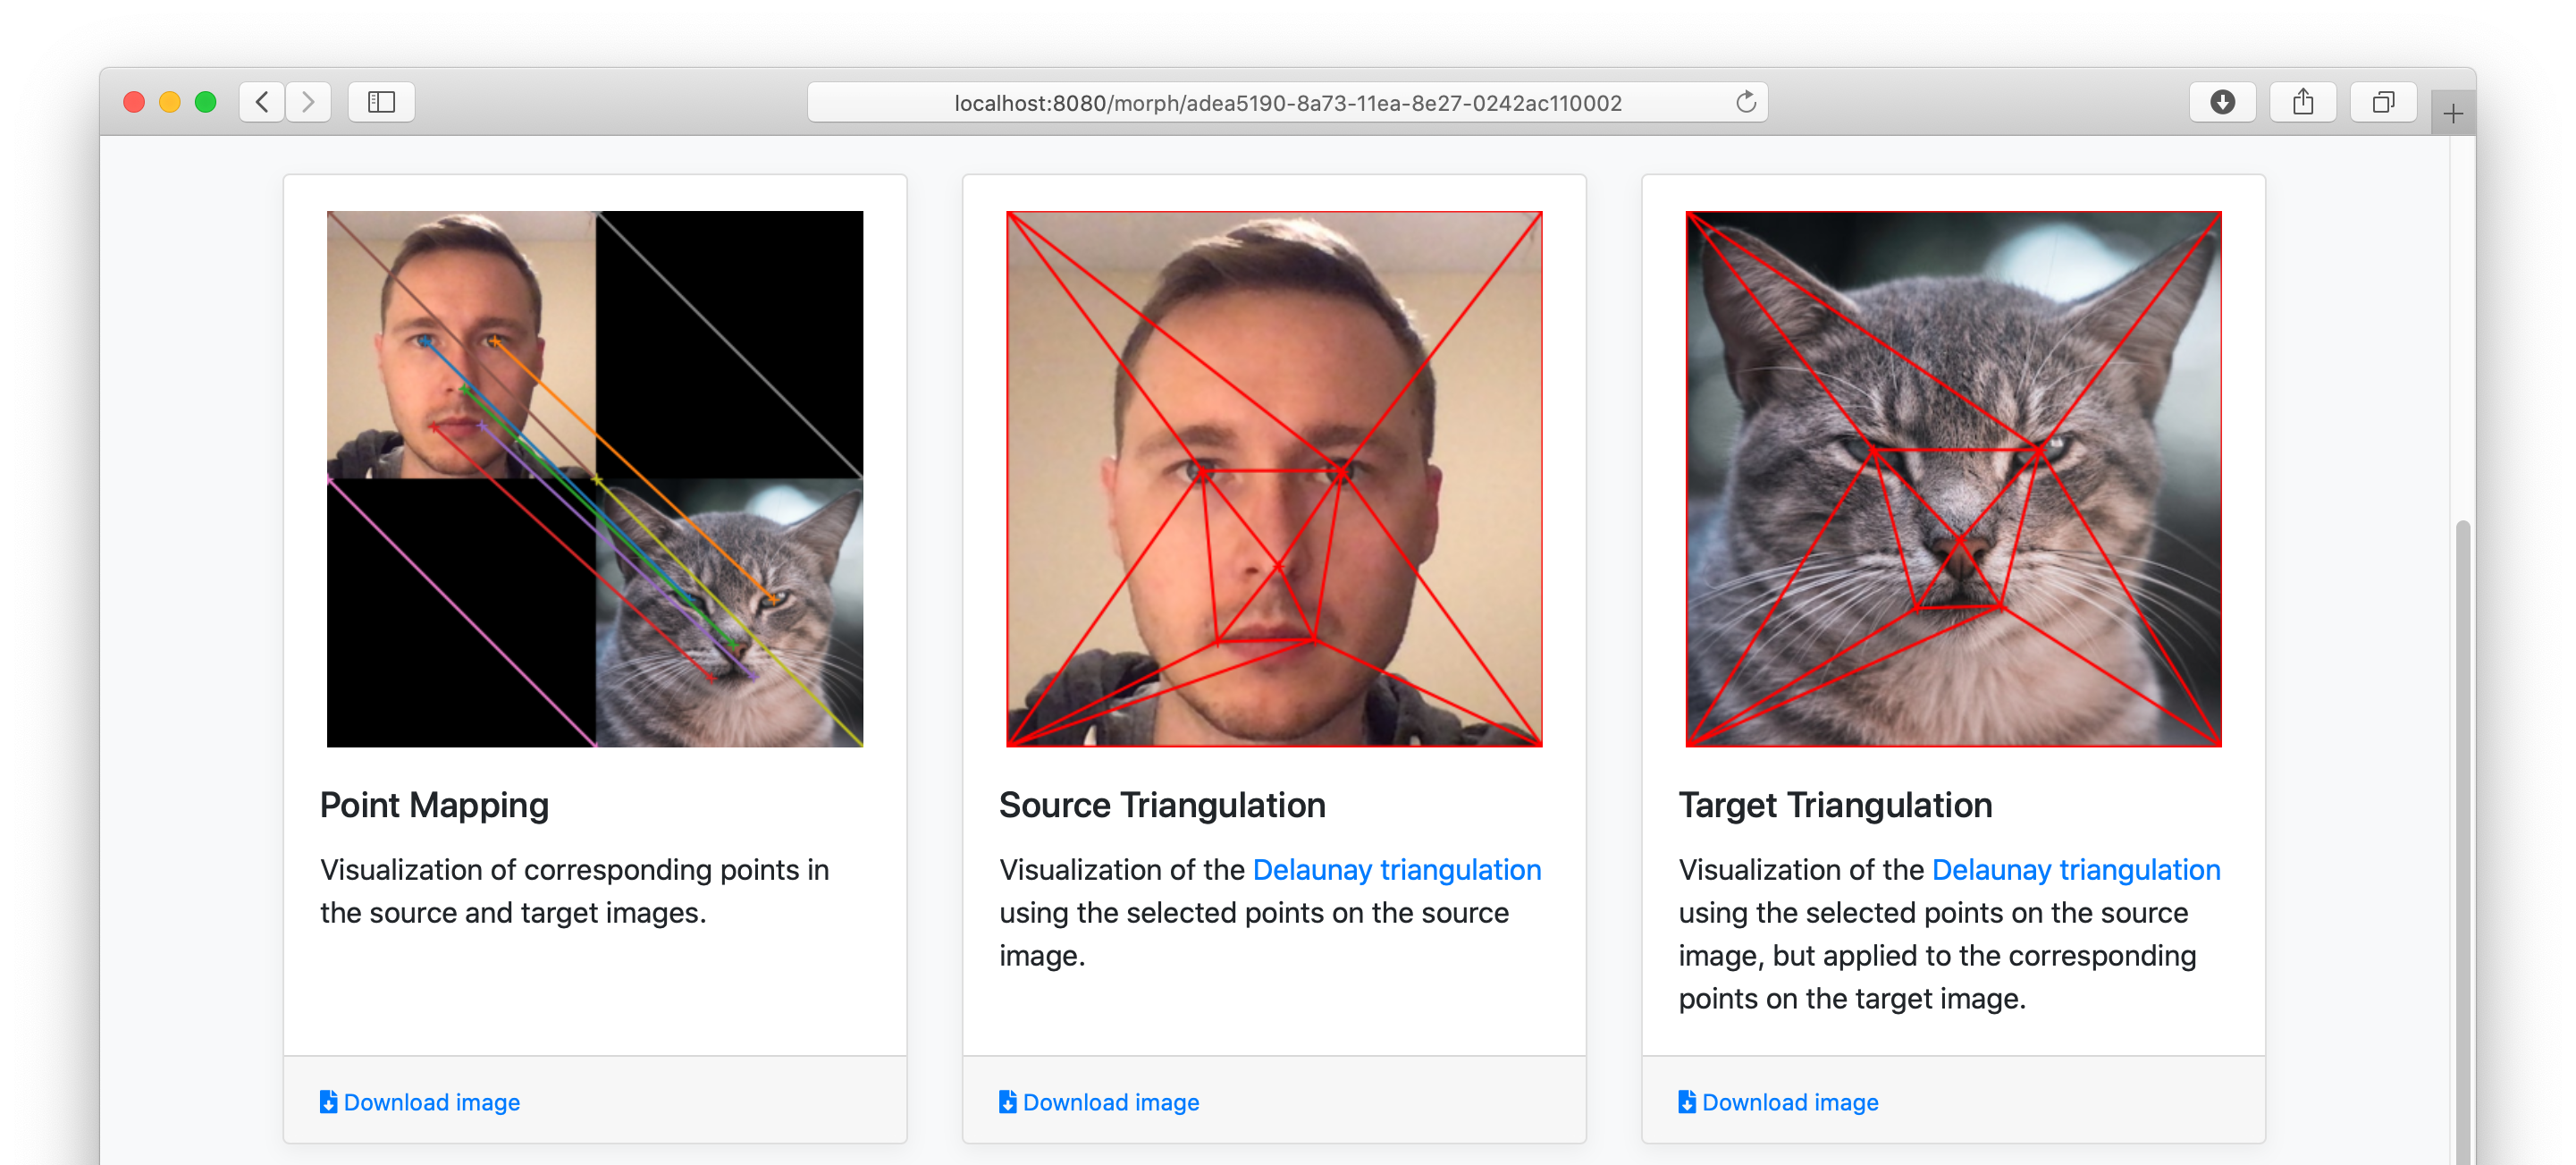
The results page is periodically polling the Flask server for results until the GIF is finally complete.
Results
By far one of my favorite results is a morph of a young Anakin Skywalker 1, to an old Anakin 2, finally to Darth Vader 3:
And a somewhat unnerving morphing of my face into a cat 4:

-
https://comicvine1.cbsistatic.com/uploads/original/11125/111250671/4775035-a1.jpg ↩
-
https://vignette.wikia.nocookie.net/swfanon/images/8/89/AnakinEstGrumpy.jpg/revision/latest/top-crop/width/360/height/450?cb=20120219201211 ↩
-
https://boygeniusreport.files.wordpress.com/2015/08/darth-vader.jpg?quality=98&strip=all ↩


